Using Bill Pay
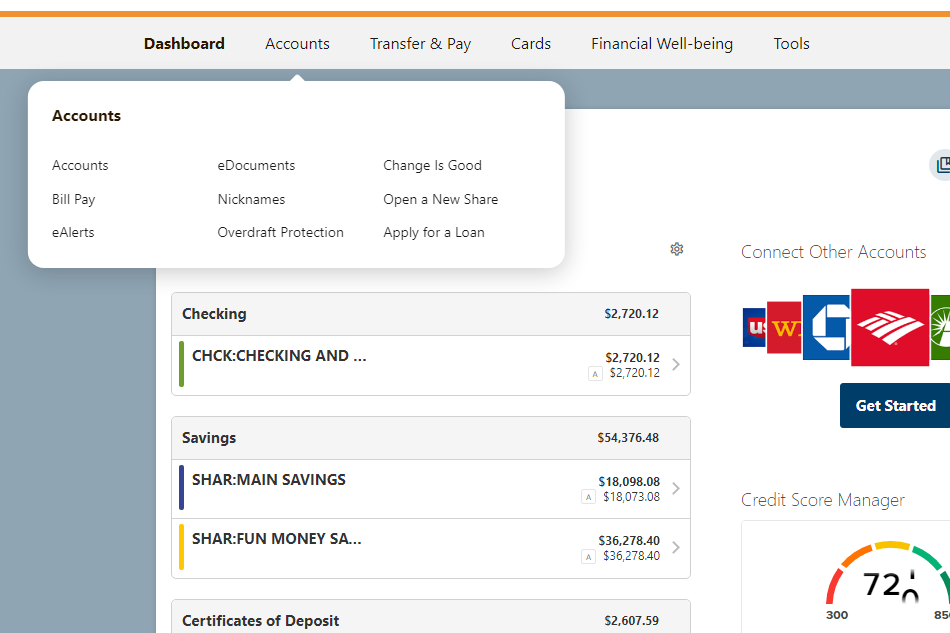
With HCU's Bill Pay feature, you can make payments to companies and individual people directly from your HCU accounts without writing checks or needing cash.
-
- More
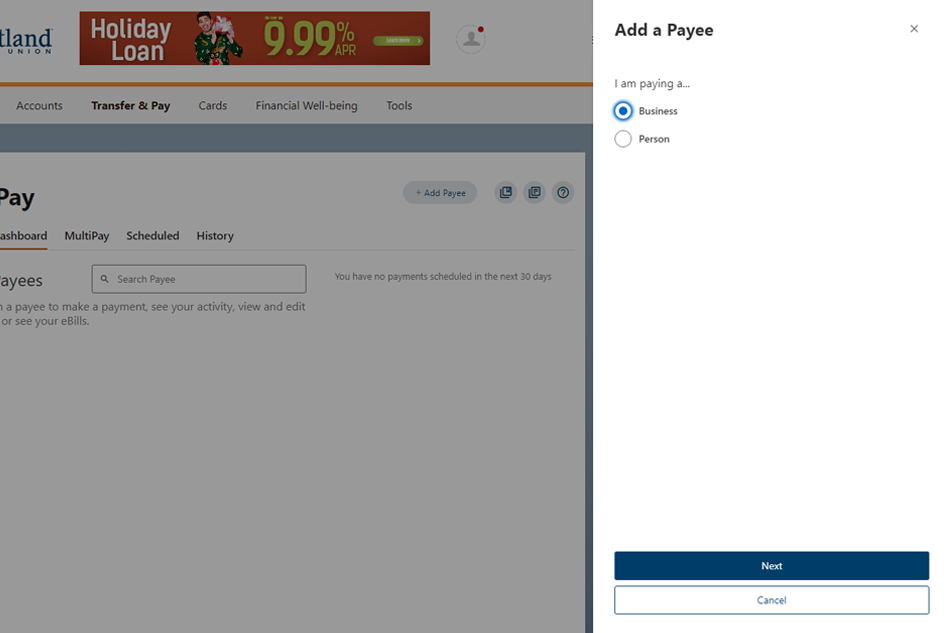
Choose Payee Type
Next, choose to pay an individual or business (service provider), then select next.
- More
-
- More
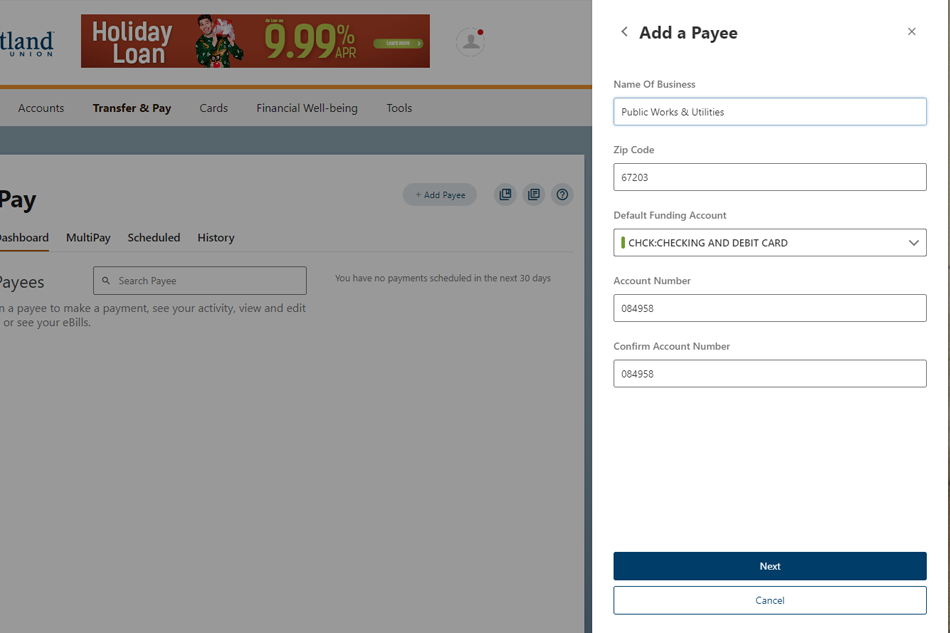
Enter Payee Name
Enter the business name, the default HCU account you wish to pay from, and the account number given to you by the business you wish to pay (this is not your HCU account number). Confirm account number then select "Next".
- More
-
- More
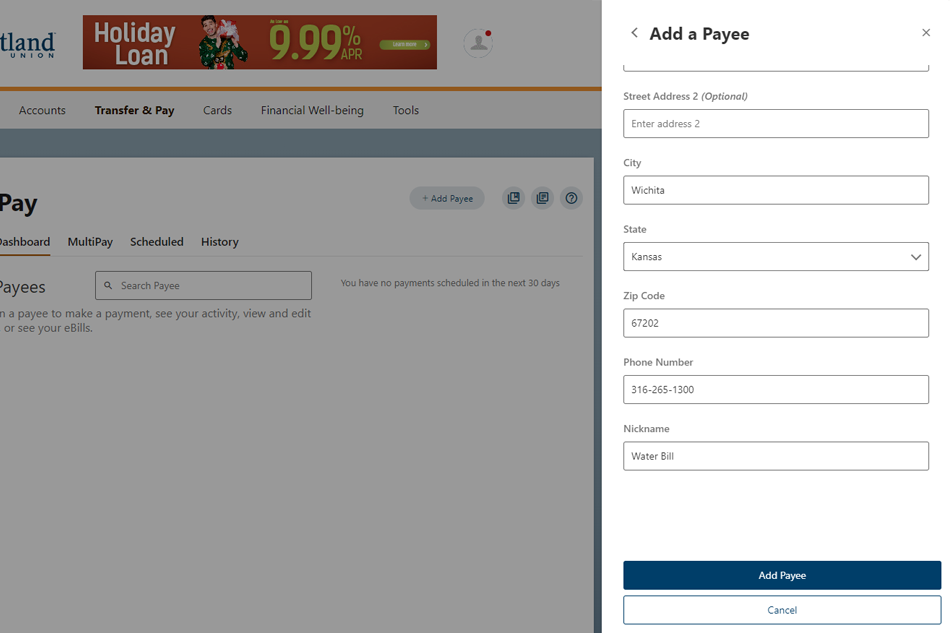
Additional Payee Info
Enter the business billing address, phone number, and a nickname, if preferred. (Business information can usually be found on your paper invoice.)
- More
-
- More
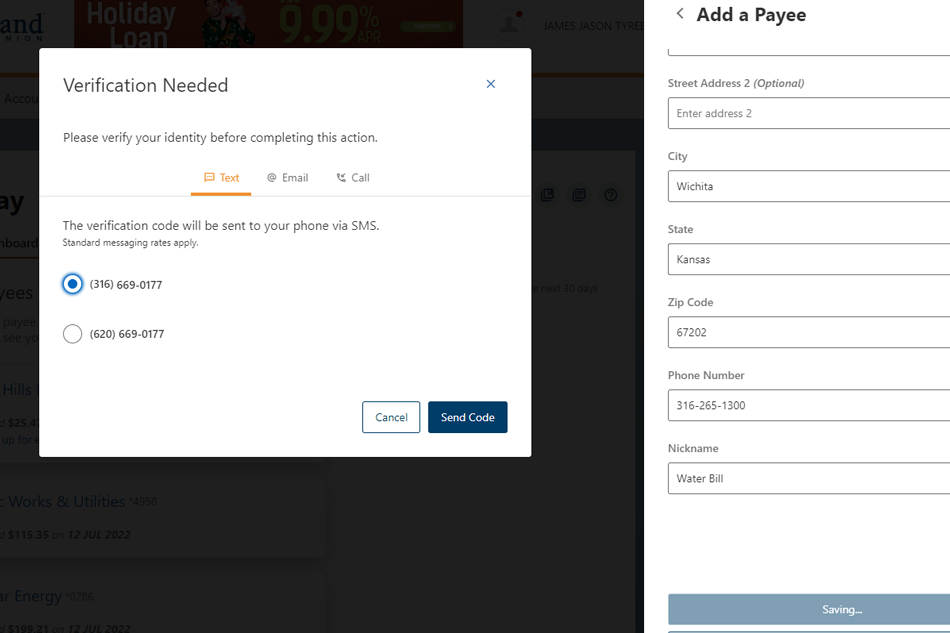
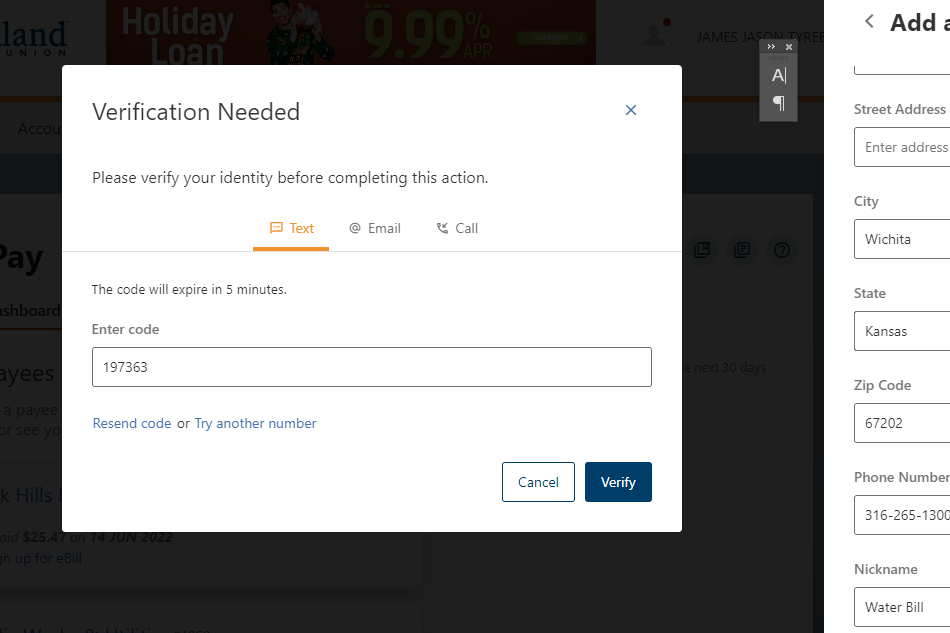
Verification
Verify that the email listed is correct and click "Send Code" to have a one-time verification code sent to the phone number HCU has on file for your account.
- More
-
- More
Temporary Passcode
Retrieve your temporary passcode from your email and enter into the "Enter code" field then click the "Verify" button to continue.
- More
-
- More
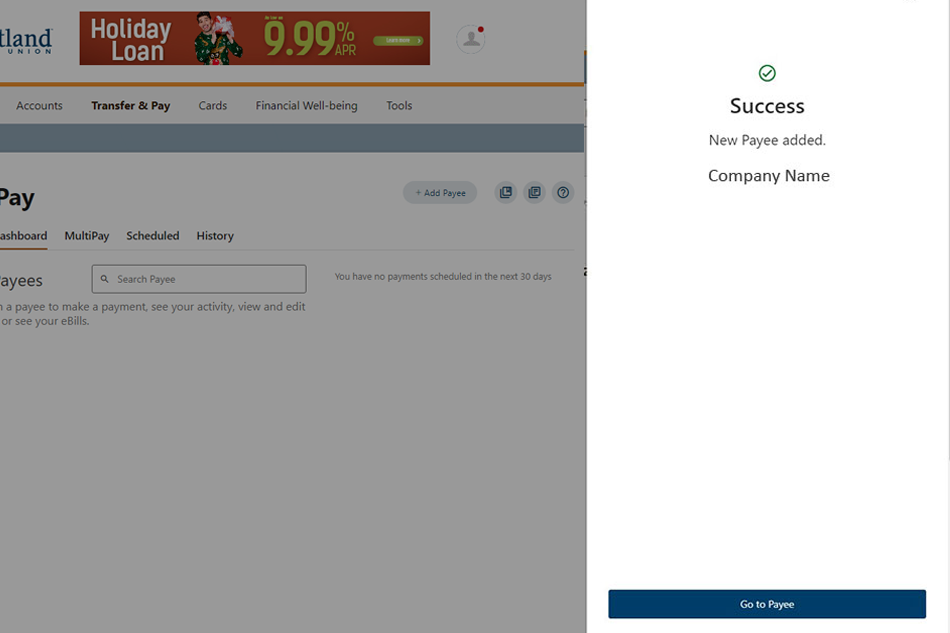
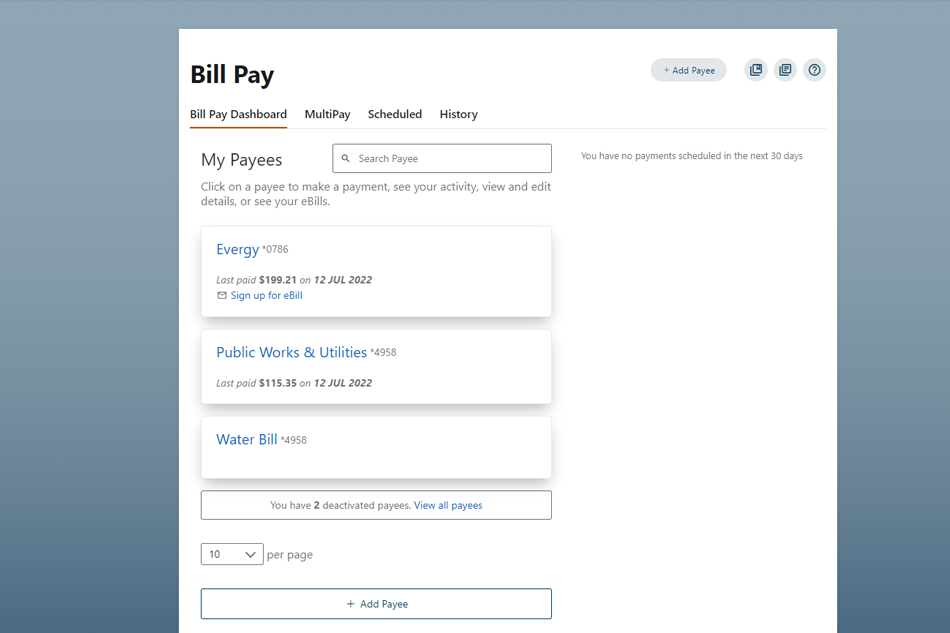
New Payee Added
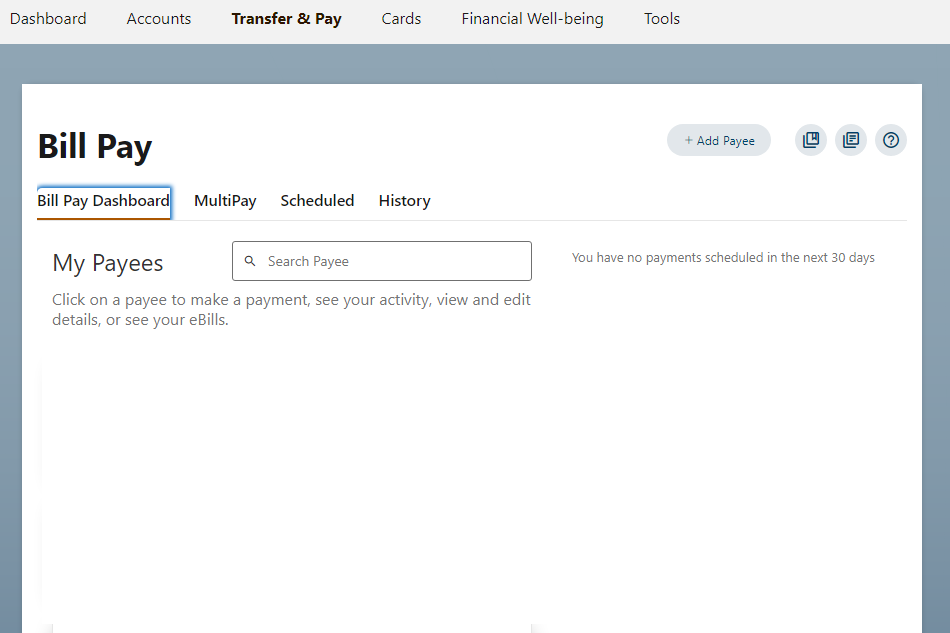
The payee will be available in your payees list. You can make a payment now or schedule one for a later date from your Bill Pay dashboard.
- More
-
- More
Make a payment
Select the payee you wish to make a payment to.
- More
-
- More
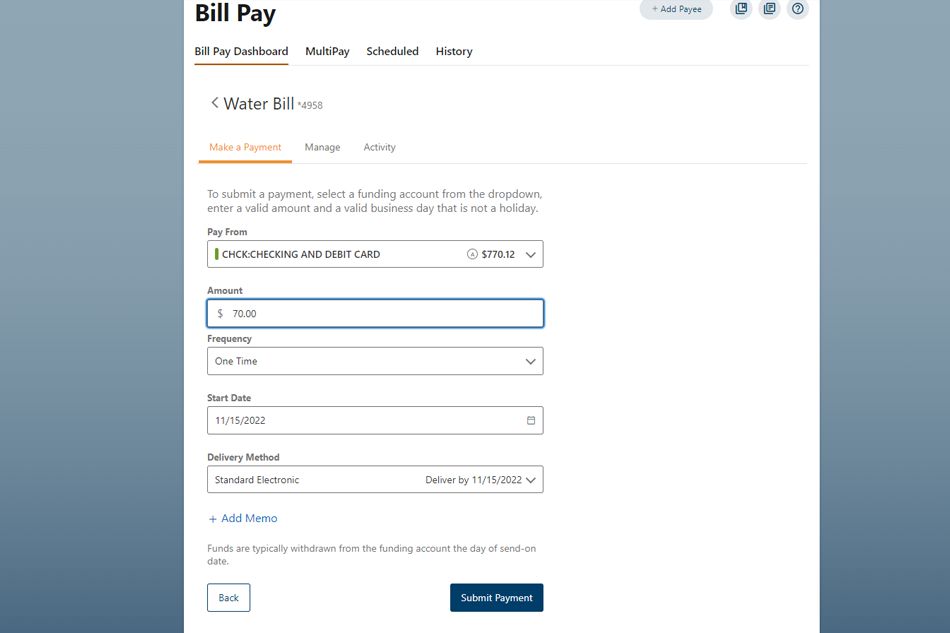
Make a payment
Select the account you want to pay from. Then enter the amount, frequency, and payment date (start date). Then click "Submit Payment".
- More
-
- More
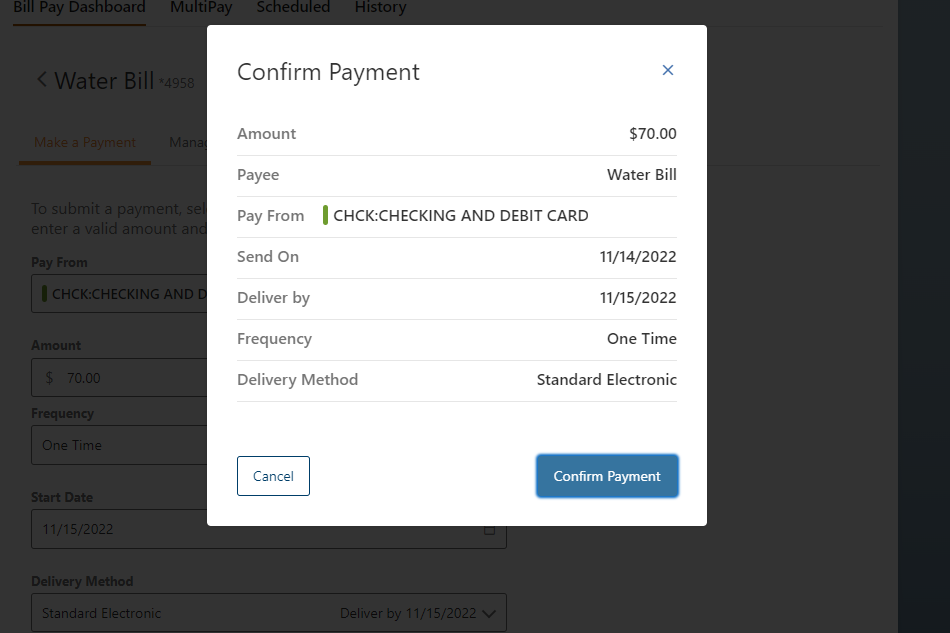
Confirm Payment Information
Review and confirm your payment information, then click "Confirm Payment".
- More
-
- More
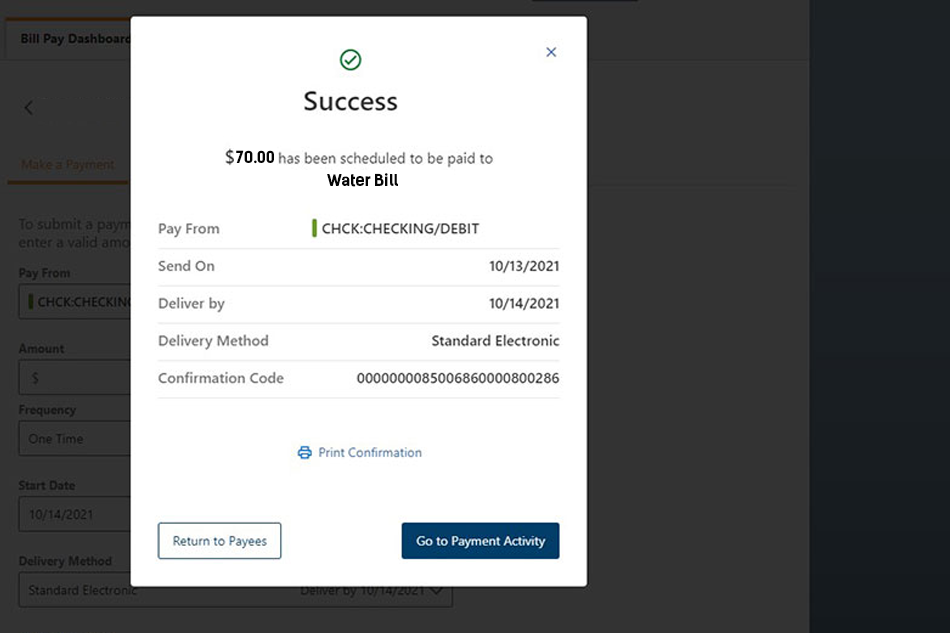
Payment Success
You have successfully completed a payment. You can click the "Go to Payment Activity" to view this payment on your Bill Pay payment calendar or "Return to Payees" to return to the Bill Pay dashboard.
- More
-
- More
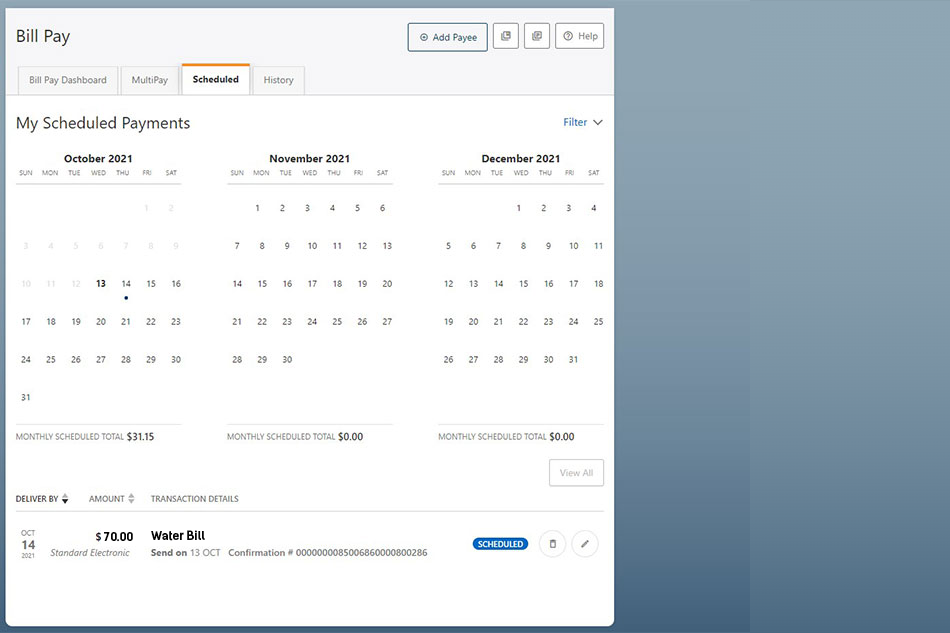
Scheduled Payments
Review your upcoming scheduled payments on your "My Scheduled Payments" calendar page. Most recent completed payments will appear at the bottom of the page.
- More
-
- More
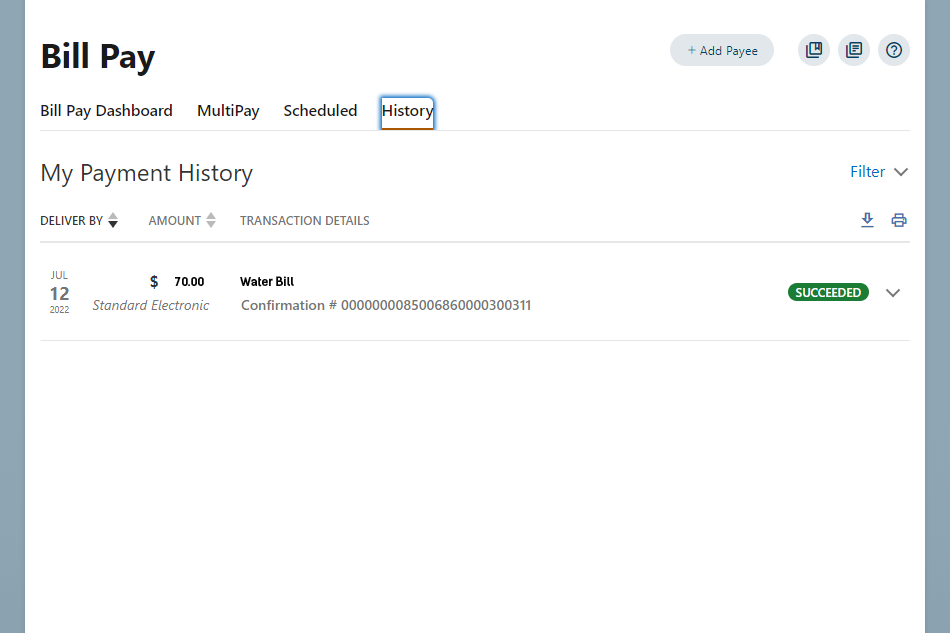
Payment History
From the Bill Pay dashbord click on the "History" tab to view a complete history of your payments.
- More
-
- More
Get Started
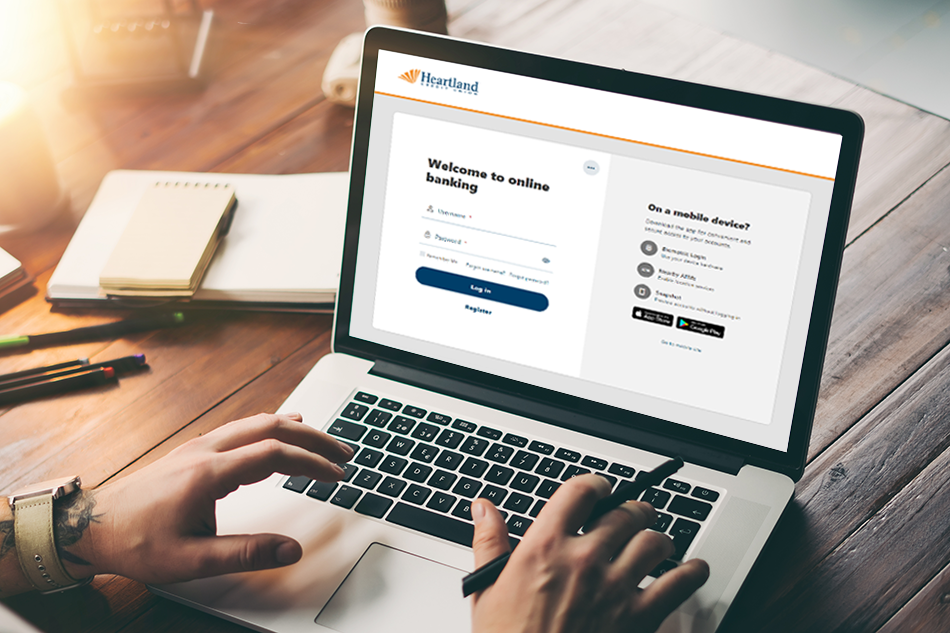
Now you're ready to start paying bills with Bill Pay and HCU Digital Banking.
- More




 Official Financial Wellness Partner Of Tiger Athletics


